


How to install a ceiling fan
These instructions are a series of "generic tips" that at no time should replace those offered by each manufacturer of ceiling fans.
Let's go through a series of steps that may be helpful:
- Disconnect power from light box and ignition switch located on the wall. It is the only way to be sure that there is no current in any of the cables.
- Remove the bulb and all existing elements in the area where the fan was installed.
- Before starting the installation, check to see if you have all the necessary parts and tools on hand. Remove the motor from the packaging. To avoid damaging the casing surfaces, mount the motor on a soft surface. Do not rest the motor on the side as it may damage it.

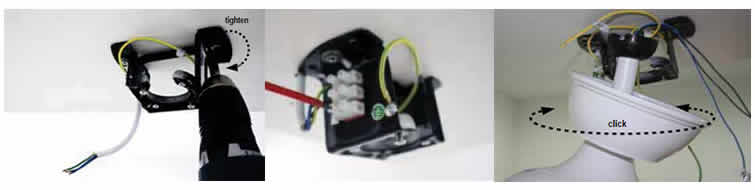
- Pass the wires through the flange, trim and pin, and then fix the motor using the pin and the hook provided by the manufacturer.

- Install the bracket on the ceiling, securing it with the lugs and screws provided by the manufacturer. Once the support has been fixed, the structure must be attached (previous step). To do this, the coupling must be inserted at the end of the shaft into the ring that has the support. The assembly will remain in suspension and we will have access to carry out the cabling comfortably.
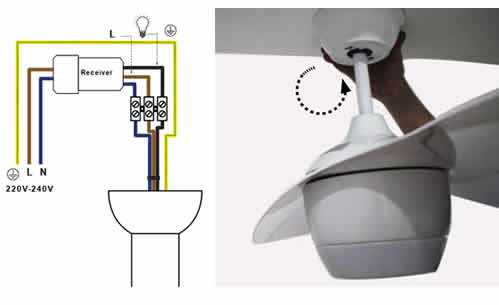
- Now we simply have to make the connection of the cables of the fan with those that leave the support. Depending on the years of the installation may vary, but usually you have a brown (phase), blue (phase) and a yellow-green (ground) cable. Simply connect it according to the image below.